小破站从Wordpress迁移到Hexo啦!并且遵循
- Serverless
- CI/CD
这两大原则,将源代码托管到了Github上,网站托管到了Cloudflare Pages上,提交代码自动构建。这篇文章记录下迁移经过以及使用指南。
安装Hexo
参考官方安装教程,仅简单记录:
- 安装Node.js
- 安装Git
- 命令行安装Hexo:
1 | npm install -g hexo-cli |
Hexo常用命令
new
1 | hexo new post "文章标题" -s "file-name" #生成文章 |
由于文章/页面标题常用中文,而文件名和url通常是英文,所以加上-s来指定文件名和url
generate
1 | hexo g |
用来生成静态文件,在部署时使用
clean
1 | hexo clean |
删掉之前生成的静态文件,相当于删除缓存
server
1 | hexo s |
在本地运行服务器,通过访问http://localhost:4000/进行预览
创建网站
新建文件夹
在命令行进入工作目录,执行下列命令:
1 | hexo init 网站文件夹名称 |
请自行修改网站文件夹名称,用英文。
完成后目录结构如下:
1 | 网站文件夹名称 |
配置网站
修改根目录下的_config.yml,主要修改下列内容:
1 | title: Logiconsole |
初步配置完成
使用主题
本站使用的是NexT主题,以该主题为例。不同主题会有不同的配置项,需要参考主题文档
安装NexT
在网站文件夹下,执行命令:
1 | npm install hexo-theme-next |
激活主题
修改网站文件夹下的_config.yml中的主题:
1 | theme: next |
配置NexT主题
修改themes/next文件夹下的_config.yml文件,下面是主要修改项:
1 | footer: |
修改字体
本站目前使用的是中文:思源宋体,英文:Roboto Serif,代码:Fira Code,都是Google Fonts上可以找到的,更换其他字体的思路类似,但是此方法只对可以在Google Fonts上搜索到的字体有效。
修改英文和代码字体
继续修改themes/next文件夹下的_config.yml文件:
1 | font: |
修改中文字体
修改themes/next/layout/_partials/head文件夹下的head.swig文件,在
1 | {{ next_font() }} |
下方添加
1 | <link href="https://fonts.loli.net/css?family=Noto+Serif+SC&display=swap" rel="stylesheet"> |
添加公式显示
我们使用katex来显示公式,其语法可以参考官方文档
安装hexo-renderer-markdown-it-plus
在终端中,回到网站文件夹根目录,执行命令:
1 | $ npm un hexo-renderer-marked |
启用katex
继续修改themes/next文件夹下的_config.yml文件:
1 | math: |
添加katex.min.css
继续修改themes/next/layout/_partials/head文件夹下的head.swig文件,在最后添加一行:
1 | <link rel="stylesheet" href="https://cdnjs.cloudflare.com/ajax/libs/KaTeX/0.11.1/katex.min.css"> |
使用katex
- 行内显示,用
$符号包裹
这是一行文字前半段$\frac{a}{b}$这是一行文字后半段
显示效果
这是一行文字前半段这是一行文字后半段
- 区块显示,用用
$$符号包裹
1 | 这是一行文字 |
显示效果
这是一行文字
这是一行文字
修改favicon
- 自行准备图标,放到
themes/next/source/images文件夹下 - 修改
themes/next文件夹下的_config.yml文件的favicon:部分
添加评论功能
由于Hexo是纯静态的网页,只能使用第三方的评论模块。NexT自带了一些第三方模块,详见官方文档。本站使用的是DisqusJS。配置方法不再赘述。
添加搜索功能
安装hexo-generator-searchdb
在网站文件夹根目录下执行:
1 | npm install hexo-generator-searchdb |
修改Hexo配置
修改根目录下的_config.yml,在最后添加如下内容:
1 | search: |
修改NexT配置
修改themes/next文件夹下的_config.yml文件:
1 | local_search: |
添加分类菜单
创建分类页面
在网站文件夹根目录下执行:
1 | hexo new page categories |
修改页面类型
修改新生成的categories/index.md文件如下:
1 |
|
激活分类菜单
修改themes/next文件夹下的_config.yml文件:
1 | menu: |
从Wordpress导入
其实从Wordpress迁移到Hexo最麻烦的还是如何保留以前的文章。这一点上Hexo做的还是不错的,除了Wordpress,官方还提供了从RSS/Jekyll/Octopress/Joomla迁移的方法,详见官方文档
安装迁移插件
在网站文件夹根目录下执行:
1 | npm install hexo-migrator-wordpress --save |
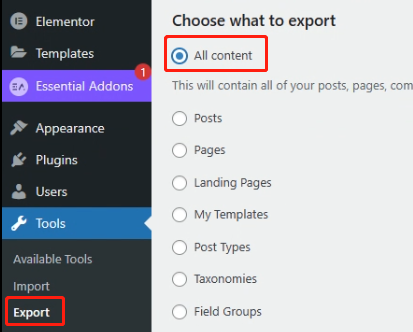
导出Wordpress备份
在Wordpress后台-Tools-Export,选择所有内容,导出,得到一个xml后缀的文件
导入
在网站文件夹根目录下执行:
1 | hexo migrate wordpress xml文件存放路径 |
完成后,在source文件夹下会生成_posts文件夹,里面是每个文章的markdown(.md)文件。每个页面也会单独生成一个文件夹,其中的index.md是页面的markdown文件。
需要注意的是,虽然导入时生成的md文件已经相当不错,但肯定达不到完美的程度,最好还是把每篇文章和页面过一遍,看看是否有问题。
如果是根据本文一步步操作的,有这么几个点需要注意:
- 用markdown语法包裹的斜体、粗体、加粗斜体,如果文字中含有括号,会被打乱,需要将括号内外的文字分别包裹
- 如果Wordpress中的图片托管在Wordpress所在的服务器上(图片URL是
<your-domain.com>/wp-content/uploads/开头的),需要根据官方文档重新整理图片资源,或者参考下方中的PicGo图床部分,将图片托管在自己的图床上,并批量修改链接
Cloudflare托管
大善人Cloudflare推出了网站托管服务Pages,和Workers加起来每天共用10万次的免费访问额度,对于个人博客来说完全够用了。如果不够用的话,建议您这么大个站点挂广告赚钱吧……
基本思路是,将Hexo的代码提交到Github的私人仓库,在Cloudflare Pages中拉取仓库代码并自动运行hexo g构建出静态页面,生成的页面由Cloudflare托管。
Github托管代码
如果你能熟练使用Git,可以直接跳到自动部署。新手的话建议按照下面的步骤操作。(当然首先你得注册一个Github账号)
安装Github Desktop
进入官网下载安装即可。安装之后的登录部分不再赘述。
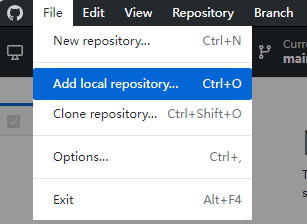
创建仓库
点击菜单中的File-Add local repository:
在弹出的窗口中,选择网站文件夹所在的目录:

这时会提示当前目录还不是一个Git仓库。点击create a repository:
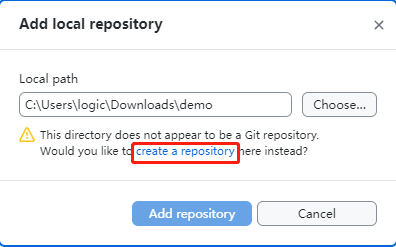
什么都不用改,直接创建:

创建完之前的弹出窗口还在,点击取消即可。
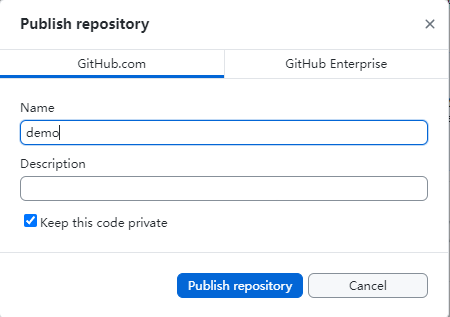
随后点击Publish repository,将仓库提交到Github。记得勾选Keep this code private,不要公开仓库:
更新
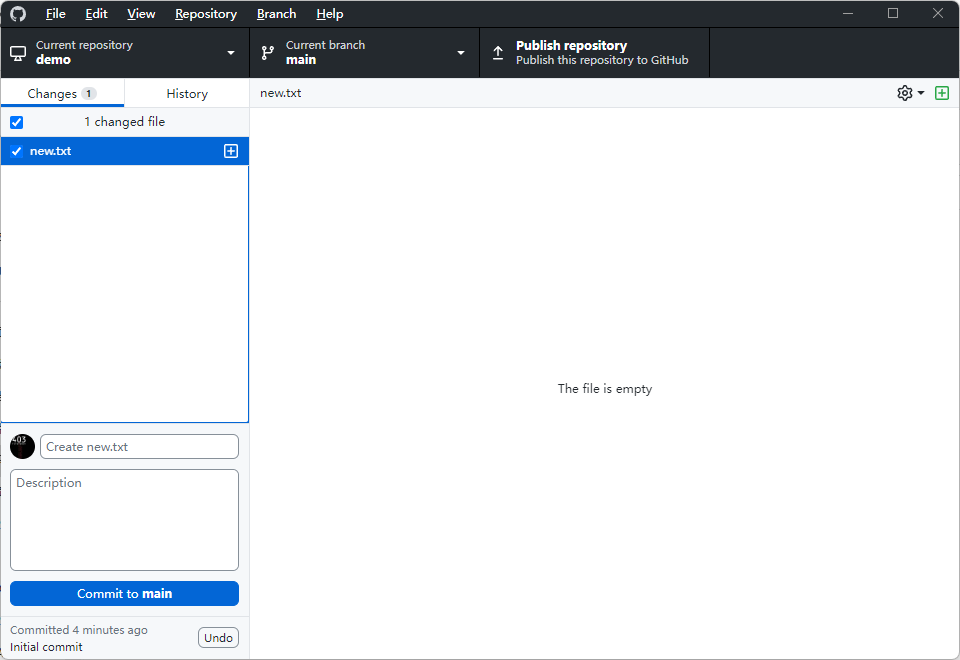
以后每次更新了代码,都只需要进入Github Desktop,先提交更改,再Publish repository即可:
Cloudflare自动部署
接下来,来到Cloudflare的部分。首先还是得保证你已经注册了一个Cloudflare免费账号。
创建Pages项目
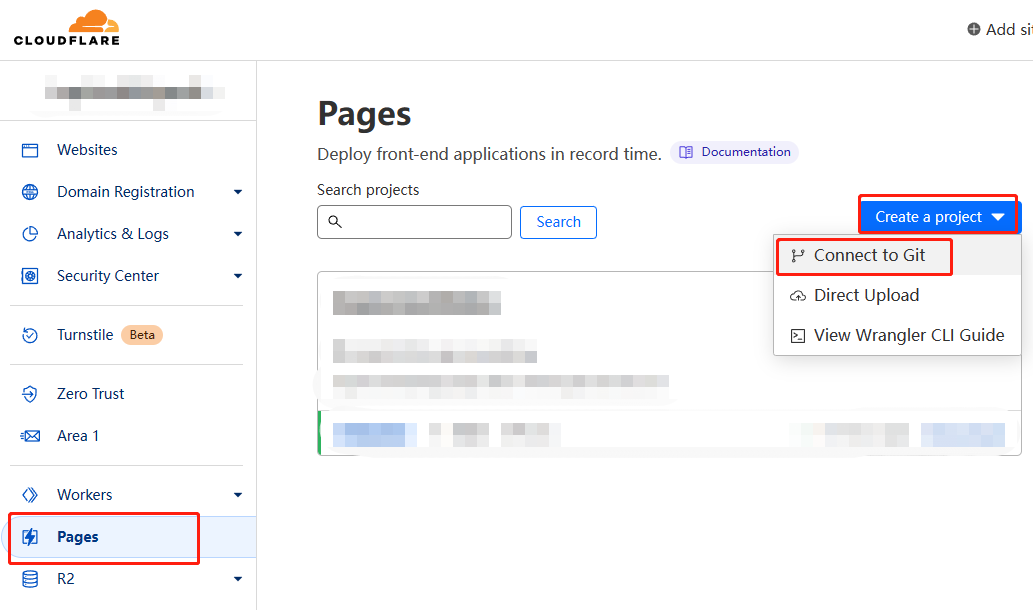
进入Cloudflare控制台,找到左侧的Pages标签,点击Create a project,选择Connect to Git:
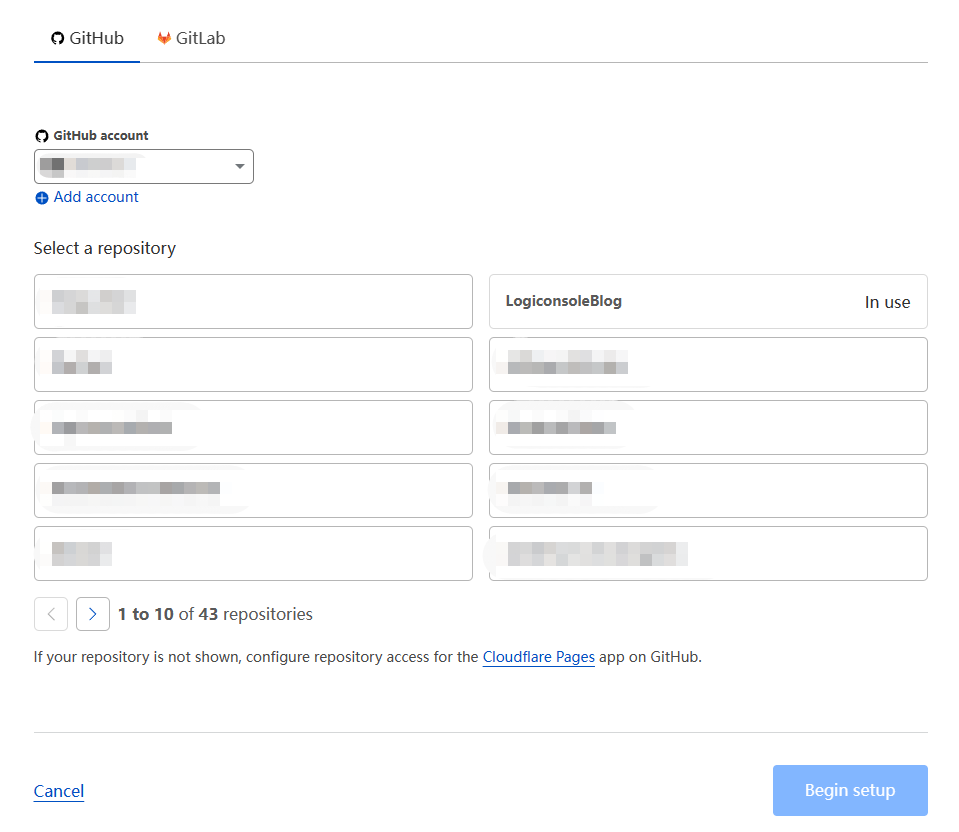
按照指引绑定你的Github账号,随后会列出你Github账户中的仓库。选择网站的仓库,点击Begin setup(截图中已经创建了,所以显示In use):
在设置界面,注意更改下面几个设置:
- Build command: 填写
hexo generate - Build output directory: 填写
public - Environment variables: 添加一条,Variable name填写
NODE_VERISON,Value填写18.15.0(node的版本号,尽量和你自己电脑上的node版本一致,可以在终端运行node -v查看)
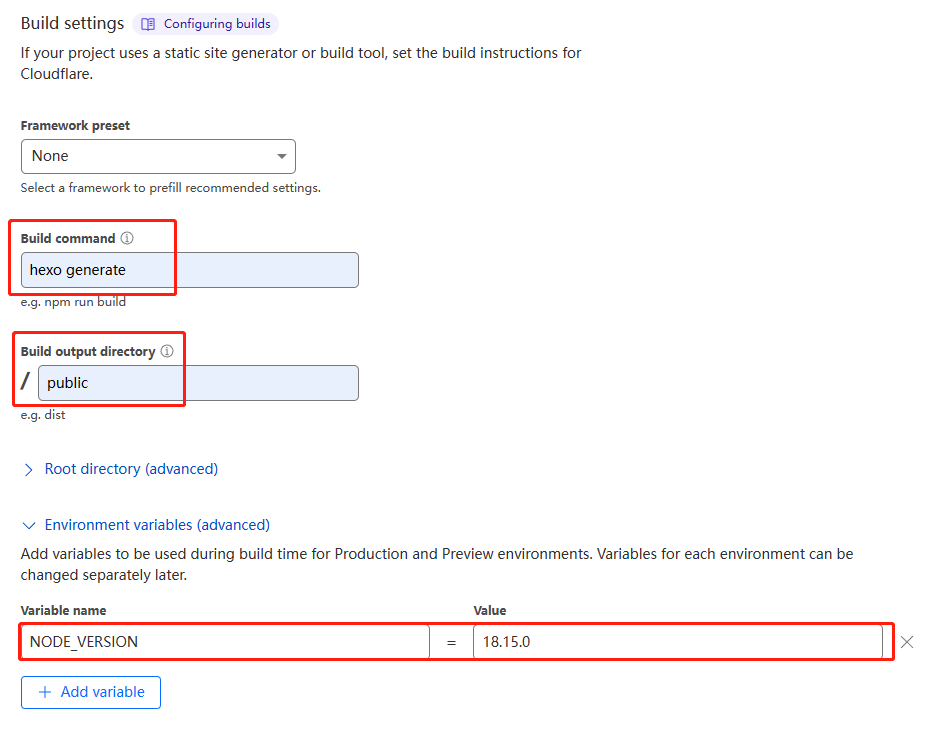
最后点击Save and Deploy就完成了。完成后,就可以通过控制台显示的网址(通常是xxx.pages.dev)访问了!
原理就是Cloudflare拉取了代码,在一个容器环境中安装了Hexo并执行了hexo g命令,最后托管了生成的public文件夹。
绑定自定义域名
如果你想使用自己的域名访问网站,操作也很简单:
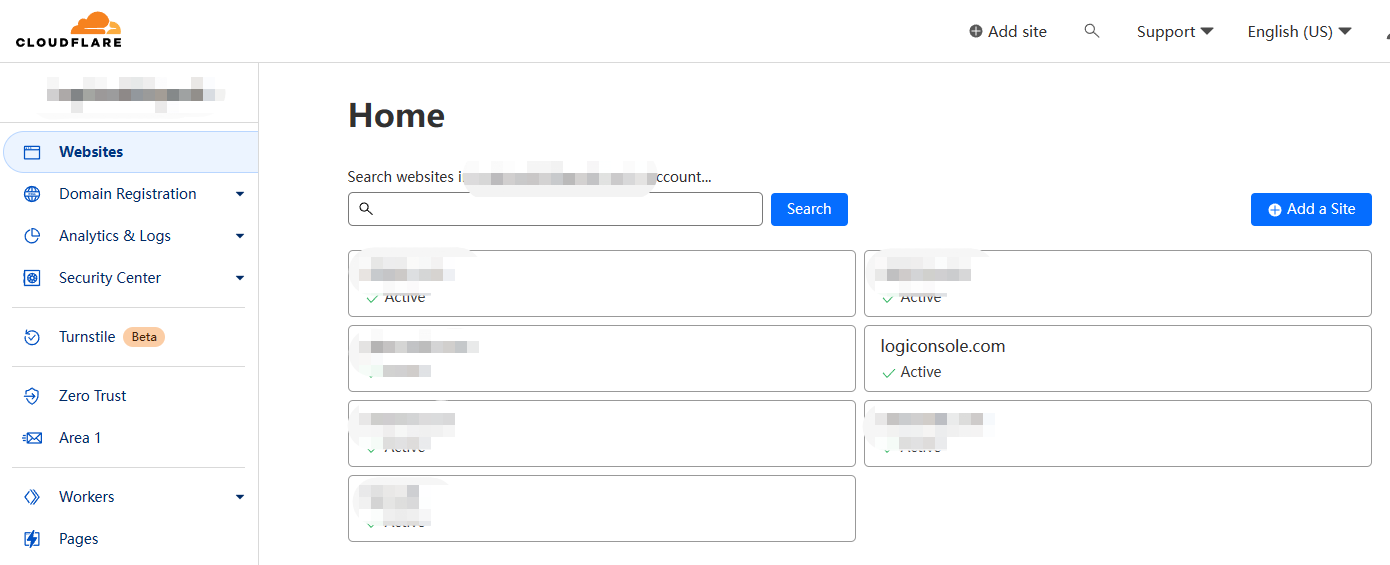
- 确保域名已经在Cloudflare下,可以通过Cloudflare控制台的Website查看。如果不知道如果转移,可以搜索相关教程:
- 进入Pages的设置页面,选择Custom domains,点击Set up a custom domain:

- 在下一个界面输入自己的域名,比如我可以输入
blog.logiconsole.com,确定,在下一个页面确认无误后点击Activate domain:
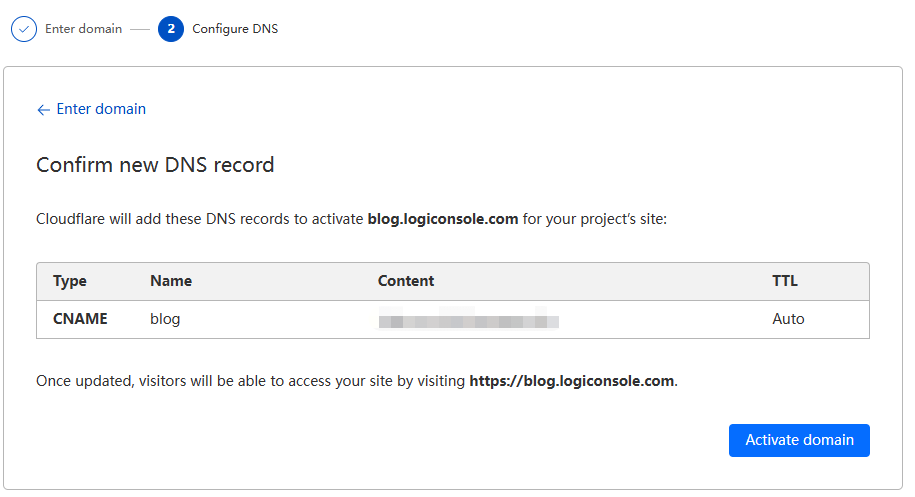
通过这些操作,Cloudflare帮你做了两件事:
- 创建一个CNAME的DNS记录,将你自己的域名指向了
xxx.pages.dev - 创建了一个完全托管的SSL证书
所以理论上,如果你不将域名转移到Cloudflare的话,也可以想办法设置CNAME的DNS记录、解决SSL证书来绑定自定义域名
大功告成
以后每次有更新将代码提交到Github时,都会触发Cloudflare进行一次新的构建和部署。
PicGo图床
个人感觉在Hexo的文件结构中一张张添加图片并引用进文章还是挺麻烦的,Markdown要插入图片,PicGo依然是我的第一选择。
以前我都是使用Github公开仓库来当图床,但是难免有一些图片不方便公开,正好看到一篇知乎好文,可以通过Cloudflare Worker反向代理Github私人仓库,达到私人图床的使用效果,感谢此文作者。可以参考原文,也可以安装下面步骤操作。
新建Github仓库
- 在Github新建一个私人仓库,比如
imagehost - 进入生成Token页面,点击Generate new token,选择classic
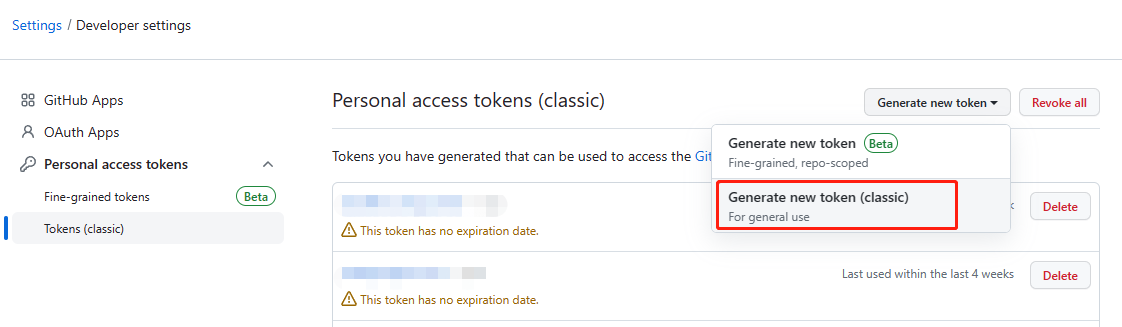
- 随便输入Note,Expiration选择
No expiration,勾选repo,点击Generate token
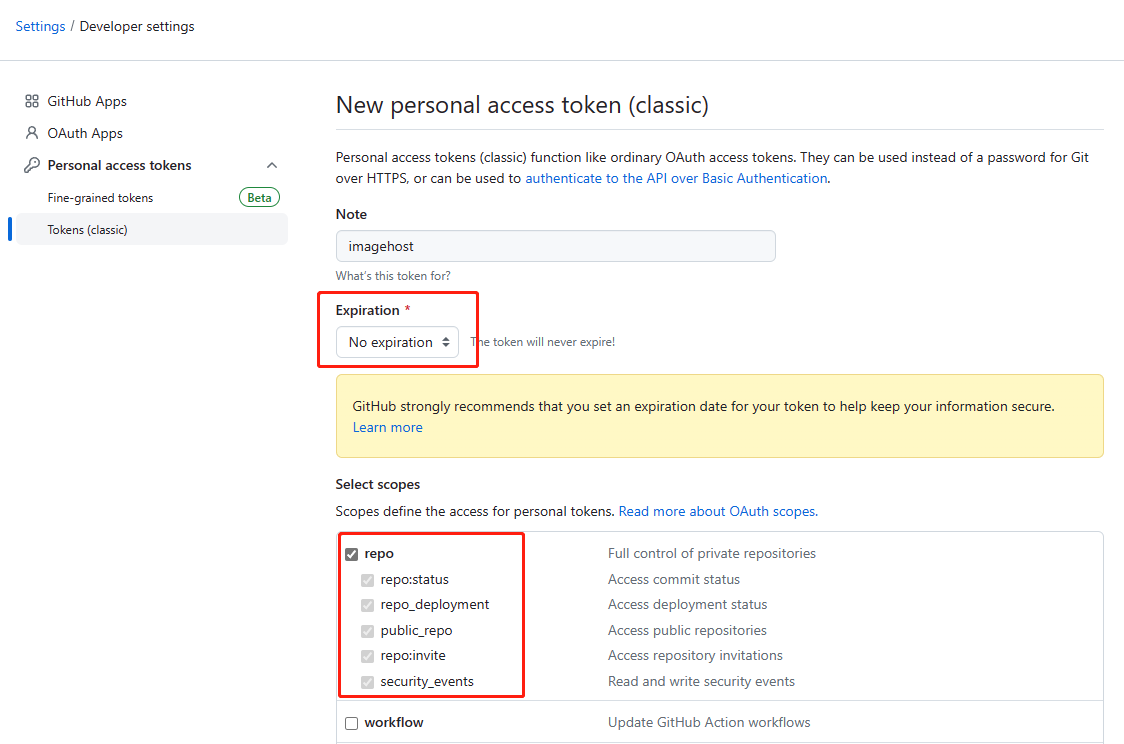
- 记住生成的token,页面刷新或关闭之后就不再显示了
Cloudflare Worker代理
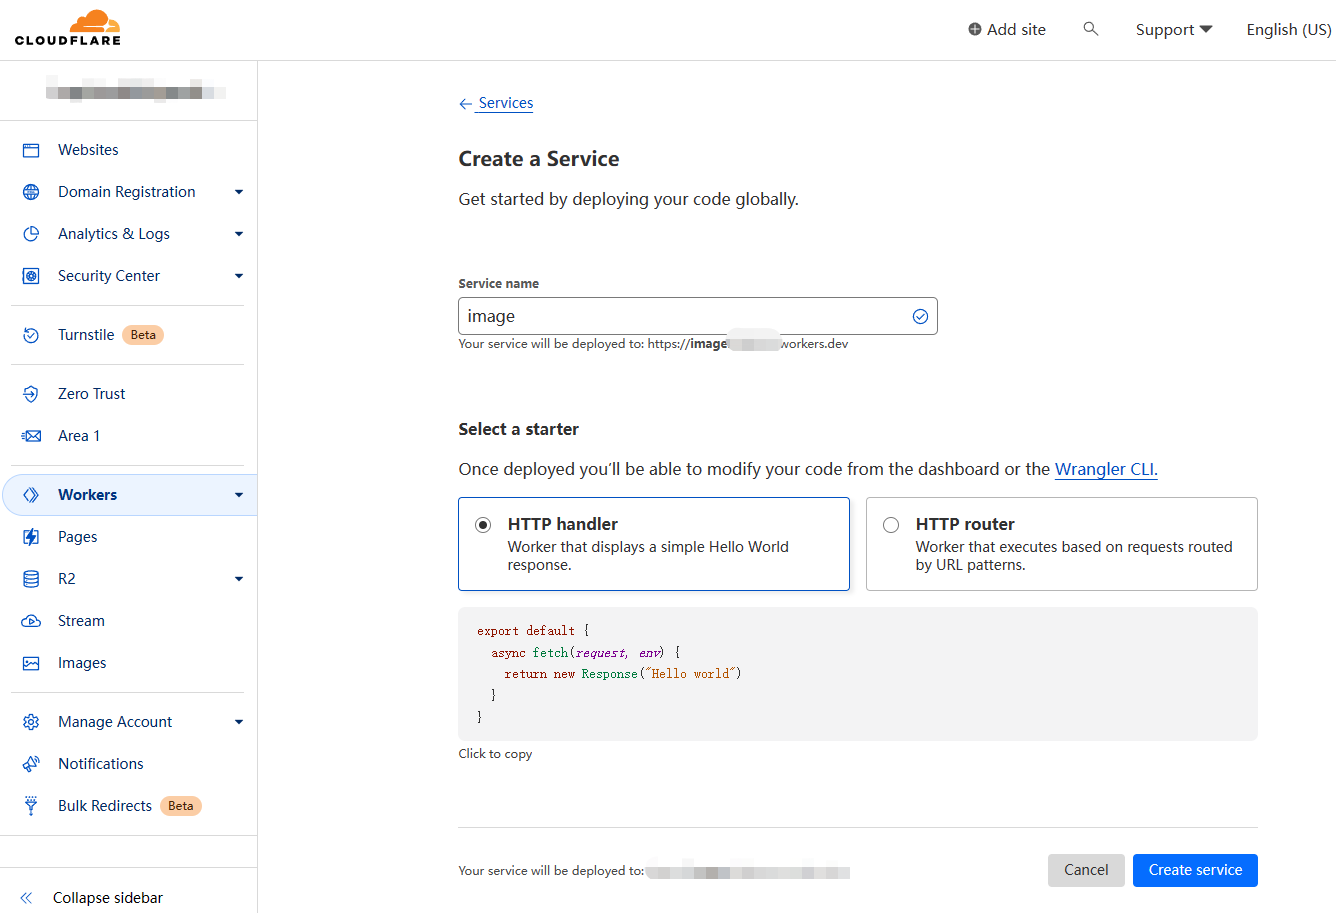
回到Cloudflare控制台,在Workers中点击Create a Service,填入服务名称(注意服务名称决定了图床的域名,我这里用的是image),其他不变,点击Create service:
在新建的服务中,点击右上角的Quick edit,无脑将下面的代码替换全部内容:
1 | // Website you intended to retrieve for users. |
其中最上方有两个地方需要修改:
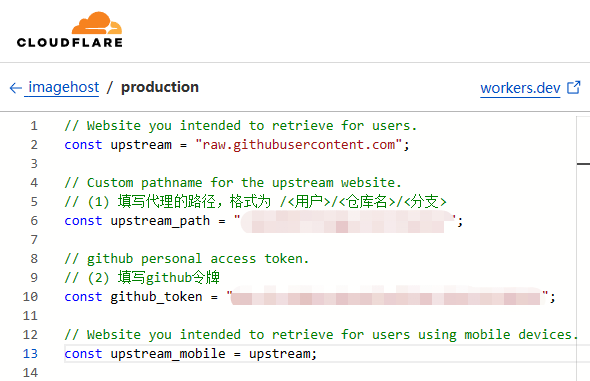
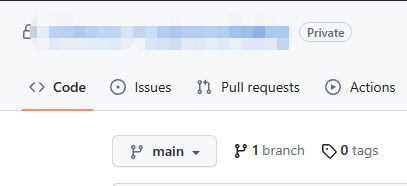
upstream_path: 格式为/<用户>/<仓库名>/<分支>,比如github用户名为username,上文创建的仓库名为imagehost,分支是main(在Github仓库页面可以看到),则填写/username/imagehost/main/
github_token: 上文新建Github仓库中创建的token
修改完后点击Save and deploy
绑定自定义图床域名
如果需要绑定自定义的图床域名,而不是使用默认的xxx.xxx.workers.dev,可以在workers的Triggers界面点击Add Custom Domain
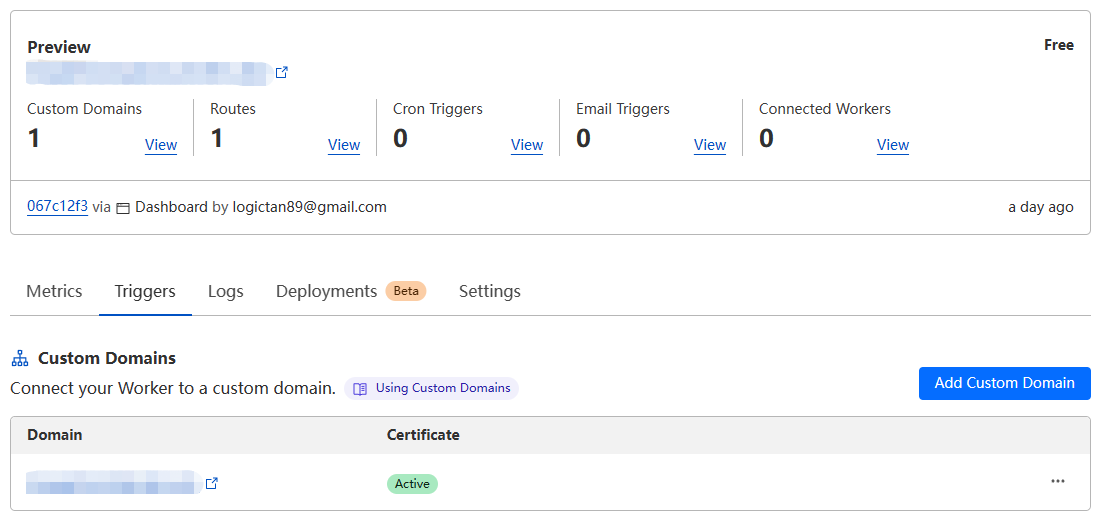
和上文中给网站绑定域名类似,Cloudflare会自动创建一个类型为Worker的dns记录:

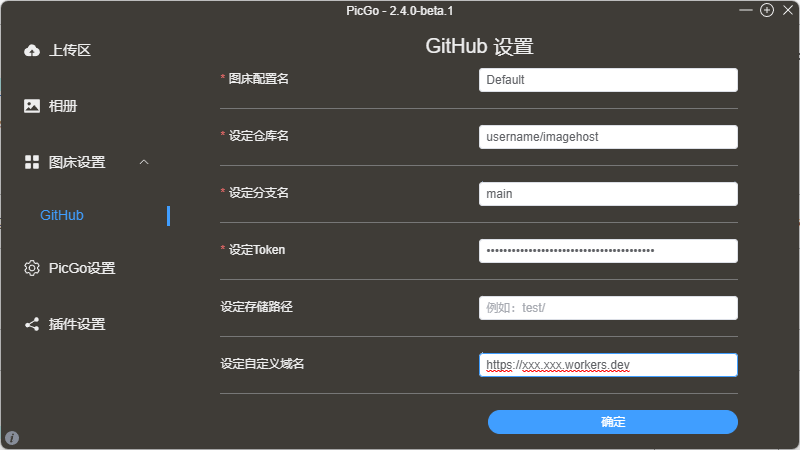
配置PicGo
打开PicGo,配置GitHub图床。仓库名、分支名、Token都是上面步骤提过的。如果绑定了自己的域名,最后一栏填入自定义域名即可。